Special Days

Teddy Bear Picnic

Teddy Bear Picnic

Special days to celebrate with children.

Going On A Picnic

Art

Teddy Bear Parade
Need: A box per child, rope, crepe paper.

Give each child a box with a rope(rope with a pull-handle works best-or tie the rope at the end to make a handle). Let the children decorate their boxes with crepe paper streamers. When the boxes are decorated, have the children place the teddy bears in their box. Then play music and have a Teddy Bear Parade.

Teddy Bear Face Mask
Need: Varied color construction paper,large crayons,hole puncher

Have children draw their own teddy bear face,cut mask out and use large rubberband to hold mask on face,the expression and originality of their idea of a bear is interesting idea for child,they may color if desired.
Contributed By: Darby

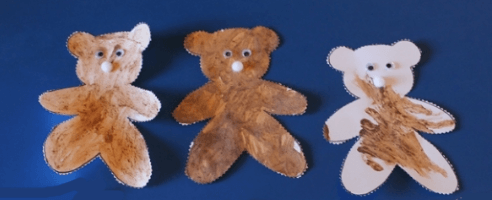
Bear head shape outline
Have children write their name on the back of the bear outline. On the front draw a bear face. Use strips of construction paper taped together to make a construction paper 'crown'. Glue or tape bear face to front to make a hat.
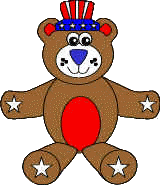
Teddy Bear USA
USA Teddy Bear
Glue bear on construction paper strips to create a hat.

Recommended Book

The Teddy Bears' Picnic by Jerry Garcia

Join Jerry Garcia in this board book edition of the all-time favorite song, illustrated by bestselling artist Bruce Whatley. It’s rollicking reimaging of the classic song—with singing, dancing, and picnicking teddy bears and a slight ’60s twist. Come along—it's time for the Teddy Bears' Picnic!

Music Story Time

Snacks

Bears like to eat fish and honey. Serve for snack goldfish and honeycomb cereal.

Math

Bears weight

Review concepts of heavy and light. Let the children use a balance to compare the weights of different teddy bears.

Before playing the games collect a large assortment of teddy bears.

Let children count the total number of Teddy Bears.

Ask the children to sort the teddy bears by categories (color, size, ones wearing bows...) Then have them count the number of teddy bears in each category.

Sites to See

Teddy Bear Picnic Printable Pack (Pre & K)

Craft projects to make your favorite bear on Teddy Bear Picnic Day.

Connect-the-dots bear and flower

Story activities and printables for Brown Bear Brown Bear What Do You See?

Tie Dye

Tie Dye

Tie Dye fun with children.

Tie Dye

1. Need: clothes dye, rubber bands, tubs (for the dye), wooden spoons, rubber gloves(don't want to dye your hands), salt.

2. Cover the work area with plastic drop cloths. Follow the directions on the clothes dye. Mix up the dye and place in tubs. If you want lighter colors add extra water to the dye mix.

3. Use 100% cotton fabrics. T-shirts, bathtowels, sheets. Make sure the fabric is 100% cotton.

4. Designs: Lay T-shirts front side up on a flat surface and smooth out all wrinkles with your hands.

Designs

Circle Designs

Pull up the center of the shirt (front and back together) and gather the fabric. Twist a rubber band tightly at the bottom of the gathered bundle of fabric. Twist more rubber bands 1/2 to 1 inch apart coming up the fabric bundle. Gather and wrap each shoulder that same as you did the center of the shirt.

How to dye--Dampen the shirt at the sink. Squeeze out the extra water. Dip the shirt in the dye tub. Squeeze out the excess dye. Remove the rubber bands and rinse the shirt at a sink until the water is almost clear. Then hang the shirt up to dry.

Note: Can dip different parts of a shirt in different color dyes. Supervise the children when they do this. Only dip and squeeze parts of a shirt that have not already been dyed. You could wind up with all your dyes turning gray!

Knotting Designs

Fold your fabric into a long rope shape. Tie over hand knots along the bundle. Proceed to the dye.

Gathering Designs

Using a piece of string slightly longer than the fabric. Roll the fabric around the string. Tie the ends of the string together, pulling the rolled fabric into a tight ball. Proceed to the dye.

Clamping Design

Fold the fabric accordion style. Clamp it with spring-type plastic clothespins along both sides long edges of the folded fabric. Alternate the clothespins. Clamp a clothespin first on one long side then the other long side. Then a clothespin on the side your started with the a clothespin on the other long edge. Proceed to the dye.

Marbling Design

Gather the fabric into a ball and tightly wrap cotton string over and over in all directions. Knot the string. After dyeing if the color is weak in an area, crumple the fabric into a ball again with that area to the outside. Tie and re-dye the fabric. Proceed to the dye.

Share

Follow Us

RSS Feed

Contact Us

Contact Us